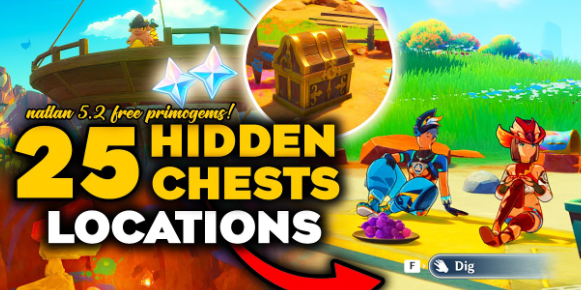
25 Hidden Chest Locations in Genshin Impact
🔍 Discover Natalin's Secret Treasures: This guide reveals 25 hidden chests in Genshin Impact's Natalin region from Patch 5.2, with step-by-step instructions and video walkthrough.
Patch 5.2PrimogemsNatalinHidden Chests
Video Walkthrough
Table of Contents
Why Hunt for Hidden Chests?
- Primogems - Each chest provides primogems for wishing
- Mora - Essential currency for leveling characters and artifacts
- Adventure EXP - Helps increase your Adventure Rank
- Rare Items - Some chests contain exclusive items and materials
- Achievement Progress - Contributes to chest-opening achievements
Chest #1 - Flower Feather Clan
- Teleport to the bottom right Waypoint of the Flower Feather Clan
- Turn around and head straight
- Jump down near the D'Ur and defeat the tribal warriors
- After collecting the chest, interact with the paint bucket to get a key
- Open the cage near the dinosaur and follow the baby Soran
- Take the second key and open the second cage
- Follow the baby Soran to get the third key
- Go to the opposite side and unlock the third cage
- After the cutscene, defeat the tribal warriors to get the chest
Note: This chest is part of a small puzzle sequence involving three cages and baby Sorans. Watch the video at 00:14 for visual guidance.
Chest #2 - Near Baby Soran
- From the location of Chest #1, head straight
- Dig the chest near the baby Soran
Tip: Look for disturbed soil or small mounds that can be dug up. This chest is very easy to miss! Check the video at 01:38 for the exact location.
Chest #3 - Masters of the Night Wind Cave
- Teleport to the Masters of the Night Wind Waypoint
- Glide straight ahead
- Enter the cave and turn into Iko Misur
- First push the horse
- Take the stone from the wall using Ikur's skill
- Place it on the glowing spot
- Pull the horse and flash the camera
Note: This puzzle requires precise timing with the camera flash. Watch the video at 01:54 for the exact sequence.
Chest #4 - Waterfall Floating Objects
- Jump down from Chest #3 location and glide towards the waterfall on your right side
- Take a bow user (like Fischl, Amber, or Ganyu)
- Hit the floating objects to reveal the chest
Tip: Any character with a bow can hit these objects, but characters with good aim mode control are easier to use. See the video at 02:51 for guidance.
Chest #5 - Waterfall Stone Puzzle
- Turn around from Chest #4 and head straight
- Turn into Iko Misur and head towards the waterfall
- Use Ur's skill to take the stone from the wall
- Place it on top of the other two stones
- Follow the baby Soran to find the chest
Note: The stone placement needs to be precise. Check the video at 03:13 for the exact position.
Chest #6 - Flower Feather Clan Seashore
- Teleport to Flower Feather Clan Statue of the Seven
- Turn into Iois Saurus and go to the top
- Head towards the seashore
- Jump down and turn into Omeisaurus
- Take the stone from the ground
- Place it between the other two stones to reveal the chest
Tip: Make sure to use the correct dinosaur form for each step. See the video at 04:00 for the exact sequence.
Chest #7 - Bird Capturing Puzzle
- Teleport to the left side Waypoint of Masters of the Night Wind
- Head straight and jump down
- A cutscene will trigger
- Turn into Urs
- Take the swimming tubes from the pillar using Itom Saur skill
- Capture the birds by placing the tubes on top of the birds
- Complete the puzzle to get the chest
Note: This puzzle can be tricky as the birds move around. Watch the video at 04:39 for the technique.
Chest #8 - Torch Puzzle Cave
- Teleport to the bottom left waypoint of Masters of the Night Wind
- Turn left and head straight
- Enter the cave on your right side
- Turn right and jump down
- First defeat the tribal warriors
- Light up the torches in this order: green paint, then purple, then blue
- Defeat the enemy that appears to get the chest
Tip: Use a Pyro character like Amber, Xiangling, or Hu Tao to light the torches. See the video at 05:40 for the exact order.
Chest #9 - Red Color Puzzle
- Teleport to the bottom Waypoint of Masters of the Night Wind
- Turn into Cucur and use the portal
- Turn around and head towards the waterfall
- Jump down and take the red color
- Shoot it on top of the structure to get the chest
Note: The aiming can be tricky. See the video at 06:41 for the exact target.
Chest #10 - Air Balloon Puzzle
- Teleport to Masters of the Night Wind Statue of the Seven
- Turn around and head towards the Iomy Source
- Turn into Ioa and take the air balloon from the wall using its skill
- Jump to the top and activate it
- Head towards the baby Soran
- Jump to the top and take the stone from the mountain
- Place it on the glowing spot of the air balloon to reveal the chest
Tip: The stone placement needs to be precise. Check the video at 07:13 for the exact position.
Chest #11 - Balloon Target Challenge
- Teleport to Flower Feather Clan Reputation Waypoint
- Head towards the upper platform and start the target balloon challenge
- Talk to Ziona to start the challenge
- Take a bow user and hit all the balloons to get the best score
- Complete the challenge to get the chest
Tip: Use a character with fast normal attacks like Fischl or Yelan. See the video at 08:02 for the challenge.
Delicious Saurus Crackers Recipe Location
Required for Chest #12
For Chest #12, you'll need the Delicious Saurus Crackers recipe. Here's how to get it:
- Teleport to the left side Waypoint of Science of the Canopy
- Turn around and go to the top
- Jump down and defeat the enemies
- You will get the recipe and ingredients
- Make some Delicious Saurus Crackers in your inventory
Tip: You can see the exact recipe location in the video at 09:16. Make sure to cook the recipe before heading to Chest #12!
Chest #12 - Saurus Crackers Puzzle
- Teleport to Flower Feather Clan Reputation Waypoint
- Head straight
- Turn into Iko Misur
- Take the stone using Iko Misur's skill
- Place Saurus Crackers on the plate
- Investigate the camera
Important: You must have the Delicious Saurus Crackers in your inventory for this puzzle. See the video at 09:51 for the exact steps.
Chest #13 - Stone Placement
- From Chest #12, turn into Iko Misur and take the stone
- Head towards the Cucur
- Place the stone between the other two stones to reveal the chest
Note: This chest is very close to Chest #12. See the video at 10:41 for the exact location.
Chest #14 - Caged Chest
- Teleport to the top Waypoint of the Flower Feather Clan
- Turn into Cucusa and glide straight
- Defeat the Hurs
- Open the cage to get the chest
Tip: This is one of the easier chests to find. See the video at 11:03 for the exact location.
Chest #15 - Time Trial Challenge
- Turn into Cucur and enter the portal
- Glide towards the left side mountain
- Use Cucur to blast the balloons to start the time trial challenge
- Complete the challenge to get the chest
Tip: Time trials require fast movement. See the video at 11:35 for the optimal route.
Chest #16 - Mountain Cart Puzzle
- Teleport to Teop and Beach
- Turn into Caurus and go to the opposite side of the mountain
- Turn into Iko Misur and take the chest from the wall
- Place the chest on top of the cart
Tip: The placement needs to be precise. See the video at 12:21 for the exact position.
Chest #17 - Frozen Enemy
- Teleport to the bottom Waypoint of Ocha Natalin
- Turn left and head straight
- Touch the frozen enemy and follow it
- Continue following until you reach the chest
Note: The frozen enemy moves quickly, so be prepared to follow it. See the video at 13:14 for the path.
Chest #18 - Portal Enemy
- Teleport to the middle Waypoint of Oan Natalin
- Turn around and head straight
- Turn right and jump down
- Head towards the portal
- An enemy will appear - defeat it to get the chest
Note: Be prepared for combat. See the video at 14:35 for the enemy's location.
Chest #19 - Platform Enemy
- Teleport to the left side Waypoint of Oan Natalin
- Turn around and jump down
- Glide towards the platform
- Touch the enemy to reveal the chest
Tip: The enemy is easy to miss. See the video at 15:11 for the exact location.
Chest #20 - Middle Platform
- Teleport to the same Waypoint as Chest #19
- Head straight
- Jump on the middle platform
- Interact with the glowing spot to reveal the chest
Tip: This chest is very close to Chest #19. See the video at 15:41 for the exact location.
Chest #21 - Enemy Defeat
- Teleport to the top left Waypoint of Oan Natalin
- Use the stairs and head straight
- Defeat the enemy to get the chest
Tip: This is a simple combat chest. See the video at 16:11 for the enemy's location.
Chest #22 - Follow Enemy
- From Chest #21, jump on the left side
- Touch and follow the enemy
- Continue following until you reach the chest
Note: Similar to Chest #17, you need to follow a moving enemy. See the video at 16:30 for the path.
Chest #23 - Mechanism Gate
- Turn right from Chest #22 and climb up
- Head straight and glide towards the platform
- Start the mechanism
- Use normal or charged attack on the mechanism to open the gate
- Defeat the enemies and start the mechanism again to get the chest
Tip: The mechanism requires precise timing. See the video at 17:17 for the exact sequence.
Chest #24 - Slingshot Puzzle
- Teleport to the top right Waypoint of Oa Natalin
- Turn around and head towards the circle platforms
- Turn into Yasur and pull the right side hook
- You can see the portal and the slingshot are aligned
- Take the orb and hit it on the aligned slingshot
- When the other slingshot shoots the orb, immediately pull the left side hook
Tip: This puzzle requires precise timing. See the video at 18:08 for the exact timing.
Chest #25 - Second Slingshot Puzzle
- Head towards the second platform from Chest #24
- Take the orb and shoot it on the slingshot
- When the slingshot shoots the orb, immediately pull the hook
- This will reveal the final chest
Tip: Similar to Chest #24, but with a different angle. See the video at 18:55 for the exact timing.
Tips for Chest Hunting
Character Recommendations
- Bring a bow character (Fischl, Ganyu, etc.) for shooting puzzles
- Characters with elemental sight can help spot hidden objects
- Bring Anemo characters for wind current puzzles
- Characters with shield abilities (Zhongli, Diona) for combat challenges
Observation Tips
- Look for unusual patterns or objects that stand out
- Pay attention to glowing spots on the ground or walls
- Check for destructible objects that might hide chests
- Watch for seelies that lead to hidden treasures
Gadgets & Tools
- Use the Treasure Compass gadget to locate nearby chests
- The Interactive Map on HoYoLAB can help track found chests
- Use Elemental Sight (middle mouse button) to spot hidden objects
- The Seelie Pet gadget sometimes reacts to nearby treasures
General Advice
- Complete world quests in the area as they often lead to hidden chests
- Some chests only appear at specific times of day
- Mark chests you've found on your in-game map
- Check high places and underwater areas that are easy to miss
- Follow this guide systematically to avoid missing any chests
Primogem Rewards
Collecting all 25 chests in this guide will reward you with approximately:
The exact amount varies based on chest rarity (Common, Exquisite, Precious, or Luxurious).